Learning to roll the perfect joint is a timeless skill, a rite of passage that connects you more deeply with the cannabis experience. It’s simpler than it looks: grind your cannabis, pack it into rolling paper with a filter, and roll it into a clean, smokeable cylinder. But mastering that process—transforming it from a clumsy effort into a smooth ritual—comes down to practice and using the right tools from the very start.
Your Essential Joint Rolling Toolkit
Before you even think about the roll, let’s assemble your toolkit. Having the right equipment is the difference between a frustrating mess and a clean, satisfying process. It’s like being a chef—you wouldn’t attempt a gourmet meal with dull knives and flimsy pans. The same principle applies here.
This isn’t about just grabbing any old paper and hoping for the best. Every component of your kit, from the grinder to the filter, plays a crucial role in the final product. It dictates how evenly your joint burns, how pure it tastes, and how enjoyable the entire experience will be.
Let’s break down exactly how to make a joint.
Key Components for a Perfect Roll
The star of the show, of course, is your cannabis. If you’re new to the world of flower, our guide on cannabis for newbies is the perfect place to explore strains and find what’s right for you.
Beyond the flower, you’ll need these essentials:
- Rolling Papers: This is your canvas. Papers come in various materials, each offering a distinct smoking experience.
- A Quality Grinder: This is non-negotiable for achieving a consistent, fluffy grind—the secret to preventing a joint that burns unevenly down one side (a “canoe”).
- Filters or ‘Crutches’: These small pieces of cardstock provide structure and, more importantly, prevent you from inhaling loose bits of flower.
- A Rolling Tray (Optional but Recommended): A simple tray keeps your workspace tidy and ensures no precious material goes to waste.
Expert Tip: The right tools don’t just make rolling easier; they directly elevate the quality of your smoke. A great grinder and the right paper can transform a harsh, uneven burn into a smooth, flavorful, and truly enjoyable session.
Choosing Your Rolling Paper
The paper you select matters more than you might think. It directly influences flavor, burn speed, and the ease of rolling.
To help you find your perfect match, here’s a practical guide to the most common types:
Choosing Your Rolling Paper
| Paper Material | Burn Rate | Flavor Profile | Best For |
|---|---|---|---|
| Wood Pulp | Fast | Noticeable, slightly “papery” | Beginners, as its sturdiness makes it easy to handle. |
| Rice Paper | Slow | Nearly tasteless, very clean | Experienced rollers who want to taste only the flower. |
| Hemp Paper | Slow | Mild, slightly sweet | Anyone seeking a smooth, natural, and eco-friendly smoke. |
Ultimately, the “best” paper is a matter of personal preference. The only way to know for sure is to experiment. Pick up a few different packs and discover what you enjoy most.
Interestingly, the demand for better, more reliable materials is a universal trend. According to the U.S. Environmental Protection Agency, a significant portion of construction waste comes from drywall, where joint compounds are critical. This reflects a broad market desire for quality components in any craft, a principle that applies just as much to rolling a joint.
The Grinder: A Non-Negotiable Tool
If you take one piece of advice, let it be this: invest in a good grinder. It’s your secret weapon. A grinder transforms dense buds into a perfectly uniform, fluffy consistency, which is absolutely essential for promoting even airflow.
When your cannabis is ground properly, your joint will burn slowly and smoothly. Trying to break it up by hand inevitably leaves you with clumps and uneven pieces—the primary cause of “canoeing,” that frustrating issue where one side of your joint burns much faster than the other.
A simple, multi-chamber grinder will instantly level up your rolling game. This small investment pays for itself in perfectly burned joints and zero wasted flower.
Preparing Your Cannabis for a Perfect Roll
Here’s a secret that separates amateurs from artists: the key to a joint that burns slowly and evenly has less to do with the roll itself and everything to do with the prep work. Your cannabis flower is the main event, and how you prepare it dictates the entire experience. A fluffy, consistent grind is the foundation for a superior smoke.
Why is this so critical? It all comes down to airflow. When your cannabis is ground to the perfect texture, air can pass through the joint smoothly, delivering that steady, even burn you’re aiming for. Skip this step, and you’re setting yourself up for failure.
Grinding for the Ideal Texture
Your goal is a texture that’s fluffy and even—think coarse breadcrumbs, not fine powder. One of the most common mistakes is over-grinding your flower until it turns to dust. This packs too tightly, chokes off airflow, and makes the joint nearly impossible to draw from.
On the other hand, under-grinding leaves you with a lumpy mess. Those chunks and clumps create air pockets and dense spots, which is the number one cause of “canoeing.” A consistent, even grind is your best defense against this frustration.
Actionable Insight: Before grinding, use your fingers to break up larger buds. Don’t overfill the grinder; give the flower room to move. This ensures every piece is shredded evenly.
The perfect grind isn’t just about making the flower smaller. It’s about maximizing the surface area, which allows for a more complete and even burn. This unlocks the full flavor and effects of your chosen strain.
Mastering Your Grinder
Using a standard four-piece grinder is simple, but there’s a technique to it. Once you’ve loaded your flower, follow these steps for a perfect grind every time:
- Gentle Twists: Give the grinder 10-15 gentle twists. You’ll feel the initial resistance give way as the buds break apart.
- Listen and Feel: Pay attention. Once you stop feeling significant resistance, your work is nearly done. Don’t just force it.
- Check Your Work: Open the main chamber and inspect the texture. If you see larger pieces, give it another turn or two. If it looks uniform and fluffy, you’re ready to roll.
This entire process takes less than 30 seconds, but it’s a total game-changer. Think of it like starting a campfire: you wouldn’t light a huge log on fire. You start with perfectly prepared kindling. Your ground cannabis is that kindling. Nailing this step is the first real move toward rolling a joint you can be proud of.
The Art of Shaping and Tucking Your Joint
This is where the magic happens. With your cannabis perfectly ground, you’re about to transform a simple piece of paper and some flower into a functional work of art. It will feel clumsy at first—that’s okay. Like any craft, it’s all about building muscle memory.
Think of it like learning to shuffle cards. At first, your hands are stiff, and cards fly everywhere. With practice, it becomes one fluid, effortless motion. That’s our goal here: to make these steps second nature.
Laying the Foundation
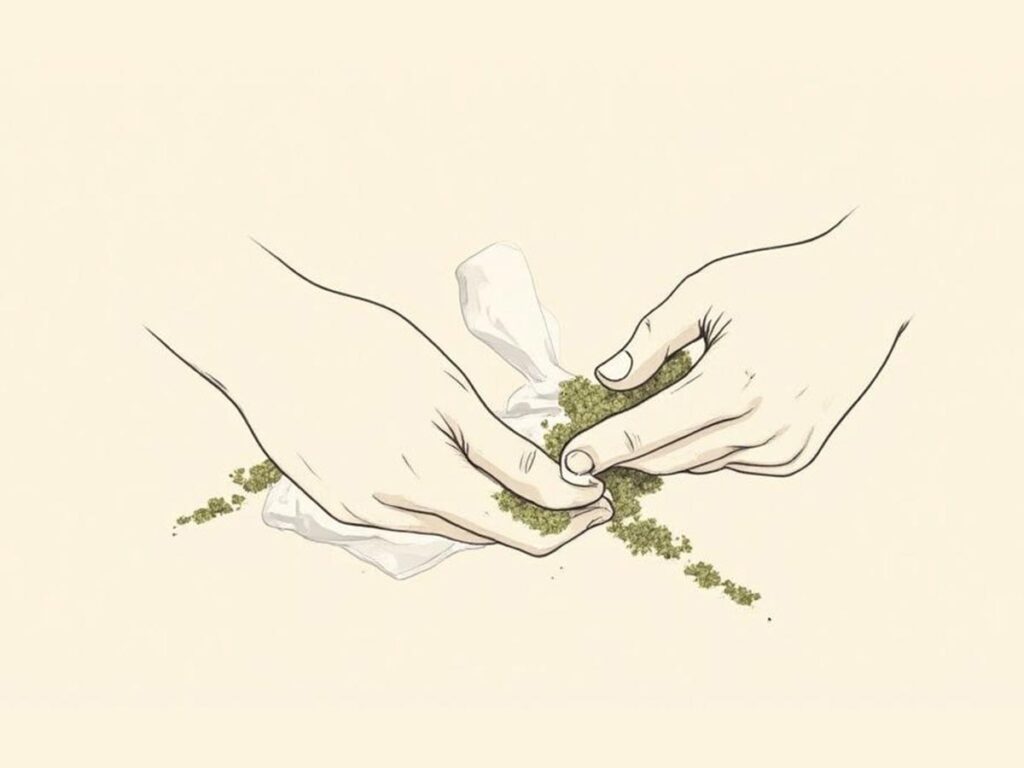
First, hold the rolling paper in your non-dominant hand. It should be creased in the middle like a taco shell, with the sticky gum strip facing up and towards you. If you’re using a filter, place it at one end of the crease. This filter is now your anchor; it provides essential structure.
Next, sprinkle your ground cannabis into the trough of the paper. Aim for an even distribution from the filter to the other end. Here’s a pro tip: try making it slightly thinner near the filter and a bit thicker towards the tip. This creates a natural cone shape, which many rollers prefer for a smoother, more flavorful burn.
Finding Your Rhythm with the Roll
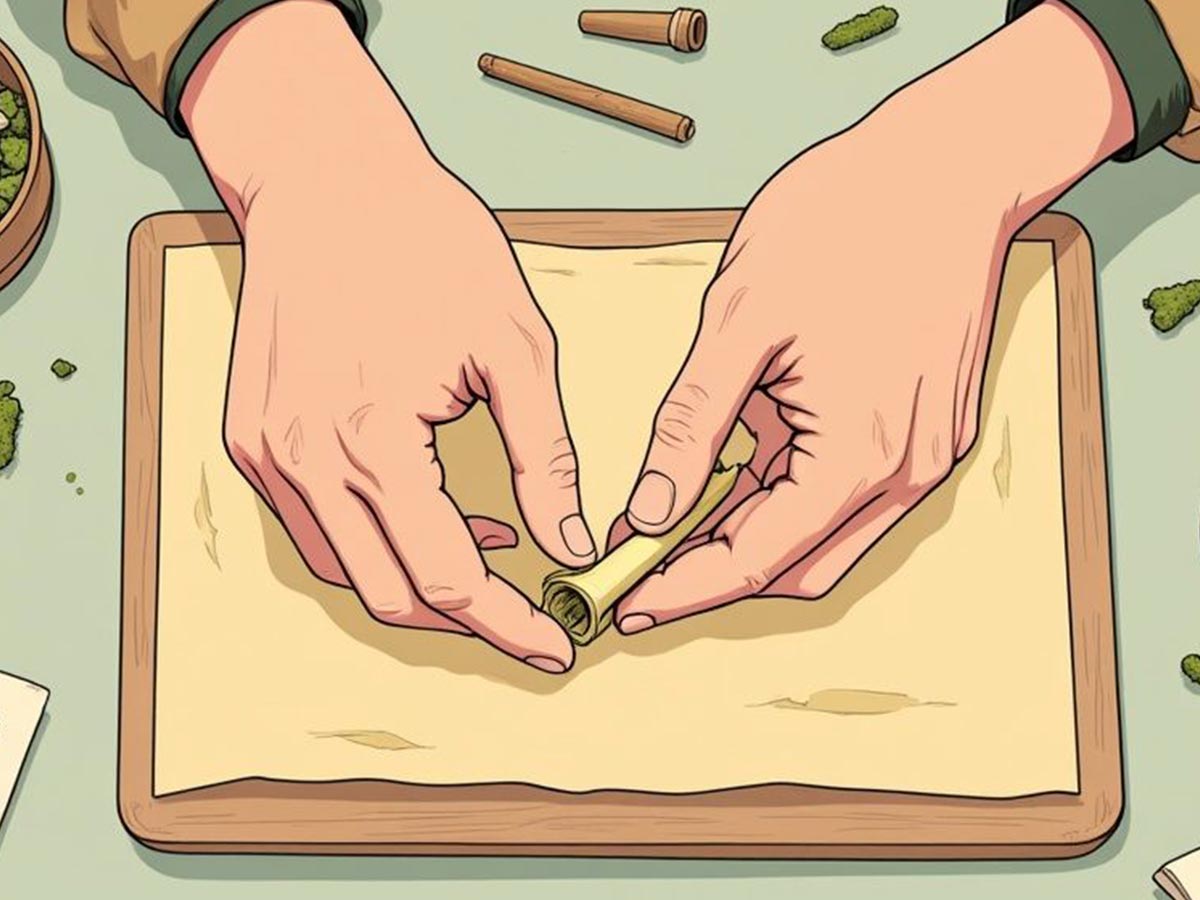
Now, let’s get a feel for it. Gently pinch the paper between your thumbs and forefingers. Begin rolling it back and forth. Your thumbs do the work here, gently coaxing the cannabis inside into a compact cylinder. You’re not sealing it yet—you’re just packing and shaping.
As you roll, you’ll feel the flower start to firm up inside the paper. Maintain that gentle rocking motion until you’ve formed a consistently packed log. Don’t rush this step. Getting the shape right at this stage makes the final tuck a thousand times easier.
The secret is finding the sweet spot with pressure. You want it firm enough to hold its shape but not so tight that you choke off airflow. It’s a delicate balance you’ll quickly master with practice.
Mastering the Tuck
The tuck. This is the single move that separates a beginner from a pro. It’s where most people stumble, so focus here.
With your cannabis now shaped into a cylinder, it’s time to tuck the front (non-gummed) edge of the paper down and around it. Use your thumbs to press down and roll, tucking that leading edge snugly behind the cannabis. It’s often easiest to start at the filter end and work your way across. This single motion captures the cannabis and initiates the final roll.
Once that edge is securely tucked from end to end, you’re on the home stretch. Continue that same upward rolling motion to wrap the rest of the paper around itself. A clean tuck determines the tightness and shape of your joint. Take your time, nail this move, and you’ll have a joint that won’t fall apart or canoe.
Finishing and Sealing for a Clean Burn
You’ve done the hard part. The tuck is clean, the shape is solid, and you’re moments away from a finished joint. Now it’s time for the final touches that elevate a decent roll into a great one. These details ensure your joint holds together and, more importantly, burns slowly and evenly from start to finish.
This stage is all about creating a secure, reliable structure that won’t let you down.
Securing the Seal
With the paper rolled snugly around the cannabis, you just need to seal the deal. That thin, shiny gum strip on the edge of the paper is all that remains.
Gently moisten the adhesive strip from one end to the other. And gently is the key word—you don’t need much moisture. A quick, light lick is all it takes. Once it’s damp, press it down firmly against the outside of the joint, smoothing it over with your finger to create a seamless bond.
Pro Tip: Whatever you do, don’t over-saturate the gum line. Too much moisture can weaken the paper, causing it to tear or unravel as you light it. A quick, decisive lick is all you need.
Let it sit for a moment to dry completely. This pause allows the adhesive to set, ensuring the seal is solid and won’t pop open. A weak seal is a classic rookie mistake that can ruin an otherwise perfect roll.
Packing for an Even Burn
Look at the open end of your joint. You’ll want to gently pack down the flower to ensure everything is uniform inside. This is perhaps the most critical step for preventing an uneven burn, or “canoeing.”
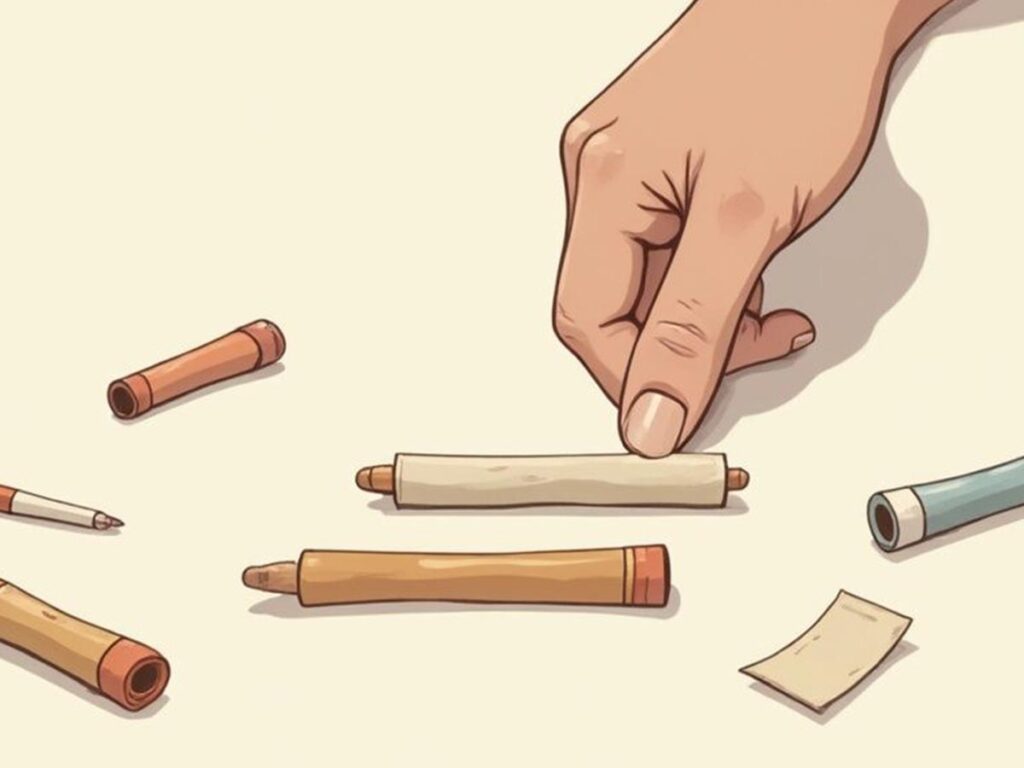
Use a thin object—a pen, the tip of a shoelace, or a dedicated packing tool—to carefully poke the cannabis down. Apply just enough pressure to lightly compact it. Don’t go overboard. The goal is a consistent pack, not a solid brick that blocks airflow.
This quick action accomplishes two things:
- It creates a flat surface at the tip, making it much easier to light evenly.
- It ensures uniform density, your best defense against one side of the joint burning faster than the other.
This might seem like a small detail, but it has a huge impact. Think about it: in large-scale manufacturing, small inconsistencies can lead to major product failures. As reported by the ISM, manufacturing trends and their impact often hinge on precision and quality control. The same principles of consistency and attention to detail apply here.
The Final Twist
The last step is the classic twist. Gently pinch the excess paper at the open end and twist it into a small wick. This does more than just look professional—it secures the cannabis inside, preventing spillage if you’re saving it for later.
When you’re ready to light up, that twisted end acts like a fuse. You can burn the very tip off before inhaling, which helps light the entire circumference of the joint at once. It’s a simple trick for a clean, perfect start every single time. And just like that, you know how to make a joint from start to finish.
How to Fix Common Rolling Problems
Let’s be realistic—nobody rolls a perfect joint on their first try. Or their second. Even seasoned pros produce a dud now and then. If you’re staring at something loose, lumpy, or utterly unsmokeable, don’t stress. Learning to troubleshoot is just as important as learning the initial technique.
Most problems you’ll encounter have simple, actionable fixes.
The Dreaded “Canoe”
The most infamous rolling mistake is the “canoe,” where one side of your joint burns far faster than the other, creating a strange, lopsided ember. It’s frustrating, but it almost always comes down to two culprits: a bad grind or a sloppy pack.
If you have lumps of flower mixed with finely ground bits, you’ve created air pockets and dense spots. The fire will race through the airy sections and crawl through the dense ones, causing an uneven burn.
The same thing happens if you don’t spread the ground cannabis evenly from tip to end. The looser side burns up in a flash. The fix is all about what you do before you roll. Take an extra 30 seconds to ensure your grind is consistent and spread it evenly in the paper.
Solving Tight and Loose Rolls
Ever roll a joint so tight you can barely get any air through it? It’s a common mistake, usually caused by packing the flower too densely or being too aggressive with the tuck-and-roll.
Fortunately, this is often fixable. Gently roll the finished joint between your thumb and index finger. A little massage can loosen the packed flower just enough to open up the airflow and save your session.
On the flip side, a loose joint is a disaster. It burns hot, harsh, and way too fast. It feels flimsy and might even fall apart. This happens when you don’t get a snug tuck before you seal it. Unfortunately, there’s no great fix for this after the fact. Your best bet is to unroll it and start over, focusing on achieving that firm, confident tuck.
Rolling is an art, but it’s not the only way to enjoy cannabis. If you’re curious about other methods, check out our guide on 5 ways to consume cannabis.
As you can see, even the final step of sealing the joint has its own set of preferences, though most people stick with the classic lick-and-seal for its simplicity.
Your Go-To Troubleshooting Guide
I’ve created a quick-reference table to help you diagnose and fix the most common issues you’ll face. Think of it as your rolling cheat sheet.
Common Rolling Problems and Solutions
| Problem | Likely Cause | How to Fix It |
|---|---|---|
| Canoeing (uneven burn) | Uneven grind or inconsistent packing. | Re-grind your flower for a uniform, fluffy consistency. Spread it evenly in the paper before rolling. |
| Too Tight (no airflow) | Over-packing the flower or rolling too aggressively. | Gently roll the finished joint between your fingers to loosen the contents and improve airflow. |
| Too Loose (burns fast/hot) | Not tucking the paper tightly enough. | Unroll and start over. Focus on getting a snug, firm tuck before you seal it. |
| Filter Falls Out | The filter was too small or not tucked securely. | Use a wider filter or ensure the paper is tucked tightly around the filter first. |
| Joint Bends in the Middle | Uneven distribution of flower (often too little in the center). | Add a bit more flower to the middle and ensure it’s packed consistently from end to end. |
Remember, every roller encounters these problems. The key is to recognize what’s happening and know how to adjust your technique for the next one.
Preventing Future Mistakes
The fastest way to improve is to pay attention to how your materials feel. Build good habits. A perfect roll is all about muscle memory, and the only way to develop that is through consistent practice.
Every imperfect joint is a lesson. Did it canoe? Check your grind next time. Was it too tight? Ease up on the pressure. The more you practice, the more rolling becomes second nature.
Got Questions About Rolling Joints? We’ve Got Answers
Even with a perfect roadmap, questions will pop up. That’s completely normal—learning any new skill comes with its own “what ifs” and “how comes.” Here are some quick, no-nonsense answers to the questions most people have when they first start rolling.
Think of this as your final briefing to get you rolling with confidence.
How Much Weed Should I Use for My First Joint?
For a standard 1 ¼ size rolling paper, a great starting point is about 0.5 grams. This is the sweet spot for a beginner. It’s enough material to work with but not so much that it becomes unmanageable.
Starting with a half-gram helps you master the technique of spreading the flower evenly without the paper overflowing. Once you nail the tuck and roll, you can confidently experiment with more, but this is the perfect amount for learning.
A classic rookie mistake is trying to roll a giant cone on the first try. Start small. Once you master the technique with a manageable amount, rolling bigger joints becomes effortless.
What’s the Point of a Filter in a Joint?
That small piece of rolled-up cardstock, often called a “crutch” or a “tip,” is far more important than it looks. It’s not just for show; it plays several key roles in improving the entire experience.
Here’s why you should use one every time:
- It adds stability: A filter provides a solid foundation, making the joint easier to hold and preventing the end from getting soggy and collapsing.
- It acts as a screen: The crutch blocks you from inhaling tiny bits of weed—an unpleasant experience known as “scooby snacks.”
- It creates space: It puts a buffer between your lips and the burning end, giving you a cooler hit and allowing you to smoke the joint all the way down without burning your fingertips.
Why Do My Joints Keep “Canoeing”?
Ah, the dreaded canoe. As mentioned, this is almost always caused by two things: an inconsistent grind or an uneven pack.
If your flower has large chunks mixed with fine powder, you’re creating a minefield of air pockets and dense spots. The flame will naturally burn faster through the looser areas, creating that ugly, lopsided burn. The fix is all in the prep work. Take a moment to ensure your weed is ground to an even, fluffy consistency and spread it out levelly before you roll.
It also helps to understand your material; some buds are denser than others. You can learn more about the physical differences and Indica vs Sativa effects to get a better sense of what you’re working with.
Can I Roll a Joint Without a Grinder?
You definitely can, but it’s far from ideal. If you’re in a pinch, you can use small, sharp scissors or even your fingers to break up the bud.
The problem is that doing it by hand almost always results in an uneven consistency, which is the number one cause of canoeing. If you plan on rolling joints more than once in a blue moon, do yourself a favor and invest in a grinder. It’s a small purchase that pays massive dividends in the quality of your smoke.